This post may contain affiliate links. Please read my disclosure for more info.
Note: If you’re serious about learning to play the guitar (especially if you want to teach yourself guitar), I strongly suggest you check out something like this online guitar app. I have a detailed review of JamPlay and other services here).
Ok, so maybe you’re feeling good about playing chords on the guitar and now you’re ready to learn how to play some riffs, solos, or melodies.
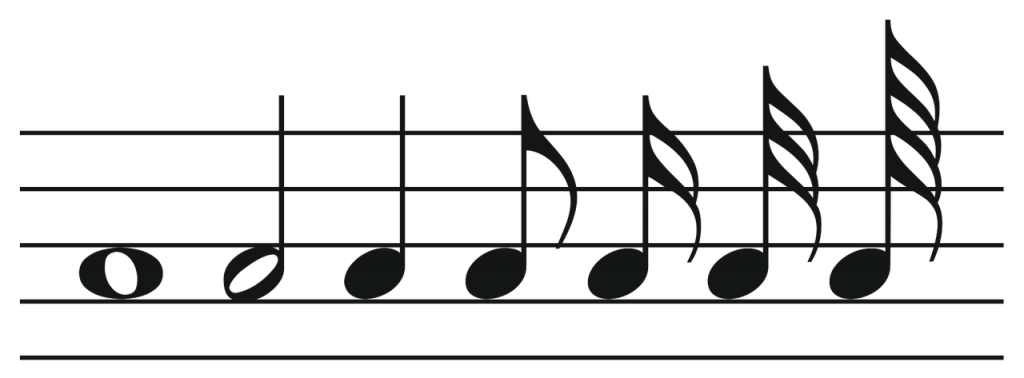
You could learn how to read music (also known as standard notation).
You know, the stuff that looks like this:

While that would work, I’m not a fan of learning to read music (as a beginner).
Reading music is extremely beneficial but it has a steep learning curve (which is probably why a lot of beginners quit before they ever get started).
Fortunately for guitar players, there is another option.
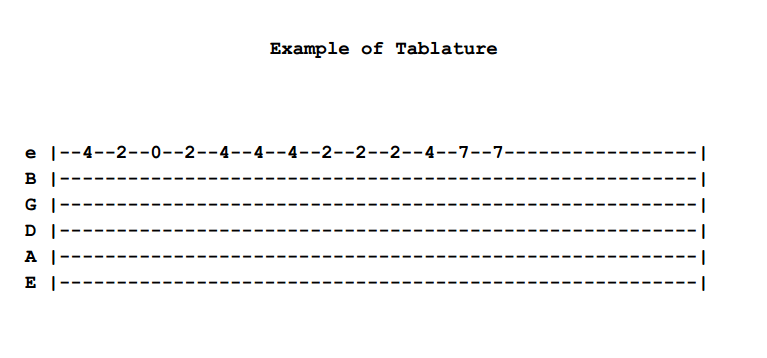
See this stuff:
 That is tablature. Pronounced TAB-la-ture. Let’s call it “tab” for short.
At first glance it looks confusing.
Like some kind of weird algebraic formula.
I assure you it’s not.
Before I teach you how to read tablature (which is super easy), I need to explain what tab is and what it isn’t.
Tab is a shortcut for learning how to play melodies, lead, or solo guitar (and to a lesser extent, chords).
Tab is a sort of common sense way of learning to translate guitar from the page to the actual instrument.
It’s a way to play music using the guitar, without actually reading music.
Tab tells you exactly which strings to press down.
It tells you the exact order of the notes you should play.
By the end of this article, you will be able to read tab… and if you can read tab… you can learn to play any song that you are familiar with.
Note: Here’s the trouble with tab: You generally need to be familiar with the music/song you want to play. Tab doesn’t tell you anything about the rhythm of the song. This is a serious downside – but one I wouldn’t worry too much about. For our purposes, we just want to get you playing some basic melodies – and tab will do just fine for this purpose.
Part One of Tablature:
First, I suggest printing out this tablature example here (so you can reference the example and read at the same time).
Ok, so here’s how tab works: Each horizontal line represents a string on your guitar.
In the example above, we have six horizontal lines (just like we have six strings on the guitar). The bottom line labeled “E” (uppercase E) is the fattest/thickest string on your guitar (the Low E string). When holding your guitar properly, it’s the string furthest from the floor (closest to the ceiling). It’s called “low” because it’s low in pitch. When you pluck the low E String it has a deep bass sound.
Go ahead and pluck low E with your thumb.
Good? Ok.
Now let’s move on to “High E”. On our tab above, “high E” is indicated by a lower case “e”. This isn’t always the case, however, when reading tab, the “High e” string will always be represented by the top line on our tablature.
Go ahead and pluck the high E string with your thumb.
All of the lines in between the High and Low E strings represent other strings on the guitar. Each line is labeled with the name of the guitar string.
Pretty self explanatory.
Part Two of Tablature:
Ok – if the horizontal lines are the strings. What are the numbers? Frets. Right.
Each time you see a number on one of the lines, it is telling you to press down at a particular fret.
Using the example above, the first number we see is “4” and it is listed on the “high e string”. Here’s what to do:
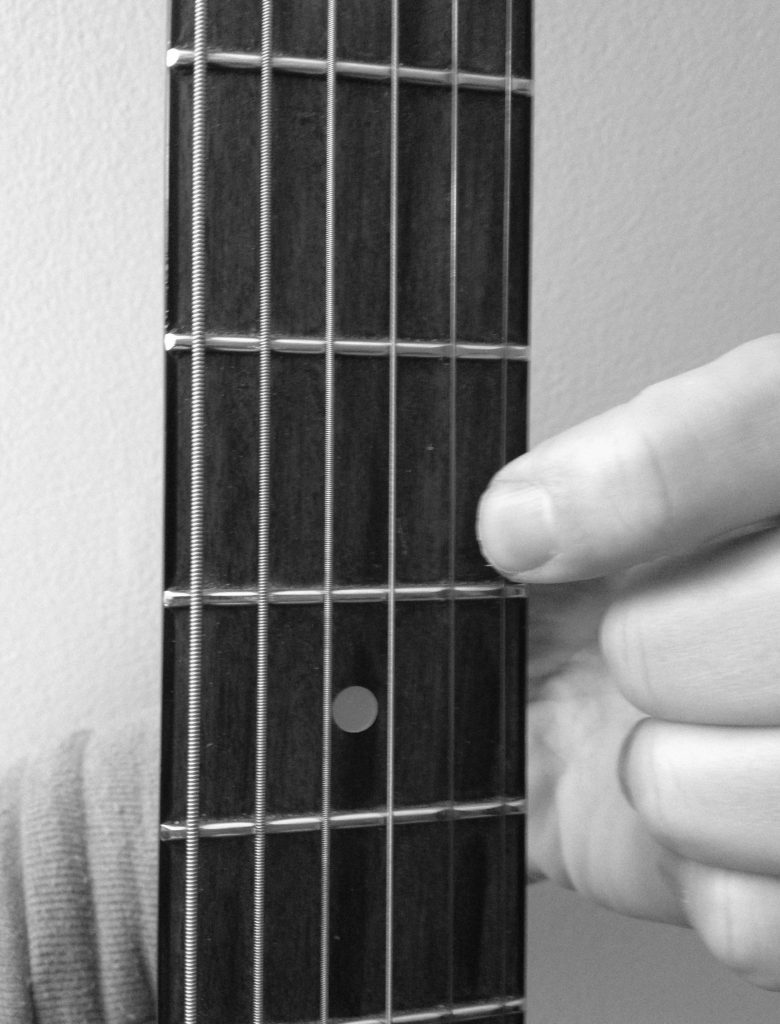
Take your index finger, and place it just above the metal fret on the high e string. It should look like this:


Notice how the finger is placed just above fret. Also, notice how the tip of the finger is used to press down the string (not so much the fingerprint part of your finger).
Just like when we play chords, we want to make sure that your finger is in the right place.
Right Place:
1. Right next to the fret.
2. Using your finger tip
3. Pressing down firmly
Wrong Place:
1. Too far away from the fret.
2. On top of the fret.
3. Using your “finger print”
4. Pressing down too lightly (which will produce a buzzing noise).
Placing your finger like this may work occasionally, though as you begin to play more complex pieces, or start to play chords, this type of finger placement can cause trouble.
All of these incorrect fretting/finger-placement techniques are very common among beginners. Try to be aware of how you’re placing your fingers. It’s best to start with good habits.
Ok. Now that we’ve played the 4th fret of the high e string. Let’s move on to the next number in the sequence. This happens to be “2”. So what do we do? Place your finger on the second fret of the high e string. Pluck it.
Got it?
Next we have a “0” listed on the high e string. What does this mean? It means you just play the high e string without pressing down any of the frets. We just play the open e string.
Got it? Good.
Now, start over from the beginning of the tab sheet (start at the beginning with the fourth fret).
Using your index finger, play all the way through the entire series of notes.
When done, the melody should sound something like “Mary had a Little Lamb”.
If it doesn’t, try again. Go slowly through the series of notes.
Make sure you press down firmly on the strings using the tip of your index finger.
Make sure you place your finger directly behind/next-to the fret.
Don’t worry if it’s slow. Don’t worry if it’s choppy. It will get better.
Keep practicing!
And that’s it! Hopefully that clears some things about about reading tablature on the guitar. If not, leave me a comment below and I’ll try to help!
(Jake Posko does Online Guitar Lessons and Coaching as well as in-home lessons in the Annapolis, Maryland area including: Annapolis, Edgewater, Severna Park, Pasadena, Crownsville, Arnold and Kent Island, inquire about lessons by e-mailing him at jake@jakeposko.com).